FOOD | HEALTH | SPIRITUALITY

Sign Up For Your BONUS GIFT!

Welcome to Sacred & Delicious! I’d like to reward your interest with two valuable gift:

The Sacred & Delicious Food List

The Sacred & Delicious Food List is an addendum to the cookbook, Sacred & Delicious. Author Lisa Mitchell decided to distribute this comprehensive list of the foods through her website so that she would be able to update it more easily. These are foods found in most modern kitchens. The list organizes the foods into categories to reflect how they fit in your diet from an Ayurvedic perspective.


While you wait for the book, enjoy reading the monthly updates on our blog,
Don’t miss out on monthly updates from the Sacred & Delicious Blog: Food • Health • Spirituality


  • Please select the house
  • This field is for validation purposes and should be left unchanged.

Sign up now for our Sacred & Delicious Blog

Receive our bonus gift: Sacred & Delicious food list!


  • Please select the truck
  • This field is for validation purposes and should be left unchanged.

Introducing Different—and Delicious!—Gluten-Free Flours

If you’ve never tried cooking or baking with ragi flour or tiger nut flour—actually made from tubers, not nuts or tigers—I guarantee that you’ll enjoy these delicious Ragi Blueberry Pancakes.

Ragi is a flour that is widely used in India. Known in the U.S. as finger millet flour, ragi has some natural sweetness and is rich in mineral nutrientsincluding calcium, magnesium, phosphorus, potassium, and iron, as well as in protein and B vitamins.

I was first introduced to ragi when my husband and I were residents at Vaidya Smita Naram’s Ayushakti  Clinic for panchakarma, a five-week program of detoxification and heavenly rejuvenation. Ragi is used in the clinic’s kitchen to make a lovely sweet that’s not overly sweet and is served in small portions at a certain stage of the rejuvenation process—a nice change of pace to a diet of mung bean soup and vegetables.

Tiger nut flour is better known than ragi in Western gluten-free circles. Tiger nut flour is also quite delicious as it is naturally sweet, and it, too, is loaded with fiber, minerals, and some protein. It’s more expensive than the more familiar gluten-free flours, so it’s optional for this recipe. It’s used here to bring additional sweetness to the pancakes without added sugar.

These two unusual gluten-free flours, combined in this recipe with oat flour, have enough protein that no xanthan gum or eggs are needed for the flours and additional  ingredients to hold together nicely.

I’m speaking as if these were my pancakes, but, in fact, my husband is the pancake maven in our household, and this is his recipe! Tom fell in love with ragi sweets in India and purchased the ragi and tiger nut flours to experiment with at home.

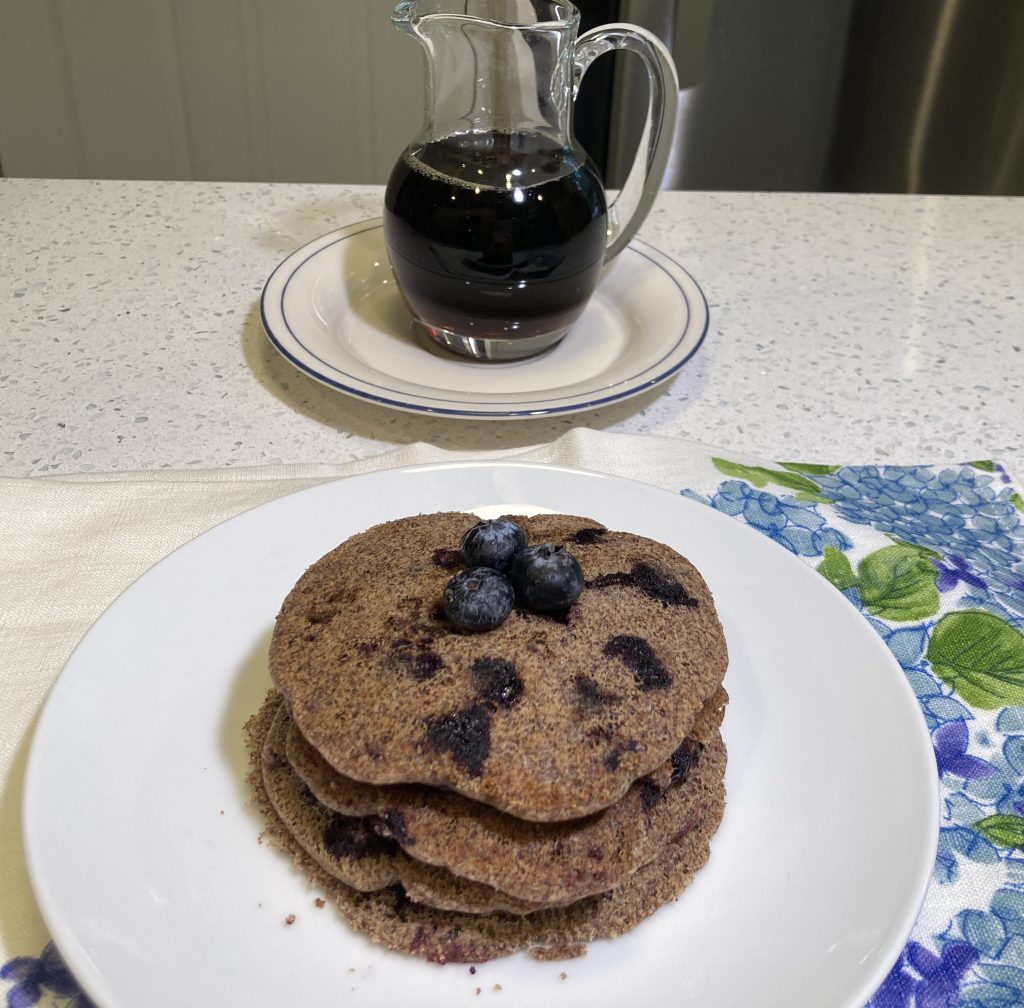
Enjoy these vegan and gluten-free Ragi Blueberry Pancakes the next time you crave something sweet for brunch or dinner!

Print

RAGI BLUEBERRY PANCAKES
Vegan/Gluten-Free


Preparation Time: About 30 minutes plus cooking time

Makes about 14 pancakes, using ¼ cup batter for each


1 cup ragi flour
¾ cup oat flour
¼ tiger nut flour (or substitute oat flour)
1 teaspoon mineral salt
1 teaspoon baking powder
1 teaspoon ground cardamom
1 teaspoon coconut sugar (optional)
¾ cup avocado oil or melted coconut oil, and more for oiling the pan
1 cup + 2 tablespoons to ¼ cups almond milk, divided (fresh, if available)  
2 teaspoons vanilla extract
2 cups blueberries
Maple syrup, warmed, or honey to taste

Cook’s Tip: Both ragi and tiger nut are dense flours, and ragi is particularly dry, which is why the recipe calls for so much oil. If you don’t have tiger nut flour, replace it with more oat flour.  

1. Heat a nonstick griddle or cast-iron pan on medium heat. Combine the dry ingredients—the flours, salt, baking powder, and cardamom. Mix well with a whisk. In a 2- or 4-cup measuring cup, combine the oil, vanilla, and 1 cup plus 2 tablespoons almond milk. Add the liquid mixture to the dry ingredients and stir well. Rinse the blueberries and stir them into the batter just before cooking. As the batter rests, it will thicken and may need the additional milk if the batter doesn’t pour easily.

2. Once the pan is hot (10 to 15 minutes preheating), grease it with a little oil, and pour the batter in quarter-cup or larger rounds. Let the pancakes cook for 3 or 4 minutes on the first side, until bubbles start to form and the pancake is firm around the edges; then flip and brown on the second side for 3 to 4 minutes, until the pancakes are cooked through. 

3. Add more oil to the pan as needed for subsequent batches. As the pan gets hotter, you may need to reduce the heat to medium-low.

4. Serve the pancakes immediately with pure warmed maple syrup or a little honey.

(Important Reminder: never cook with honey, as cooking or baking temperatures cause the honey to become toxic, according to Ayurveda.)


These are delicious without syrup!

Comments are closed.